Custom cursor effects replace the default pointer with a branded, animated element that follows the mouse. They add a polished, interactive feel to portfolio sites, agency pages, and creative projects. Here’s how to build one for WordPress using GSAP.
What you’ll build
A smooth cursor follower with a dot that tracks the mouse with a slight trailing lag, plus hover scaling on interactive elements. This is desktop-only by design; cursor effects don’t apply to touch devices, so we’ll disable them gracefully on mobile.
Move your mouse into the demo area below to see it in action:
Move your mouse around. Hover the buttons. Click.
Step 1: Add GSAP
GSAP loads via CDN, so there’s nothing to install. Use a plugin like “WPCode” or “Insert Headers and Footers” to add this script to your site’s footer. No WordPress animation plugin needed.
<script src="https://cdn.jsdelivr.net/npm/gsap@3.14.2/dist/gsap.min.js"></script>No ScrollTrigger needed for this effect since it’s cursor-driven, not scroll-driven.
If you’re weighing whether GSAP is the right tool for this vs pure CSS, see our CSS vs GSAP comparison. Cursor-following effects need continuous position tracking, which CSS can’t do.
Step 2: Add the cursor HTML and CSS
First, add a single div that will become your custom cursor:
<div class="custom-cursor"></div>Then add the CSS. You can place this in your theme’s custom CSS field, the WordPress Customizer, or your child theme’s style.css:
/* Hide default cursor on desktop */
@media (pointer: fine) {
  body {
    cursor: none;
  }
}

.custom-cursor {
  position: fixed;
  top: 0;
  left: 0;
  width: 20px;
  height: 20px;
  border-radius: 50%;
  background: #c8ff00;
  pointer-events: none;
  z-index: 9999;
  transform: translate(-50%, -50%);
  mix-blend-mode: difference;
}

/* Keep default cursor for touch devices */
@media (pointer: coarse) {
  .custom-cursor {
    display: none;
  }
}
A few things to note here. The pointer: fine media query ensures we only hide the default cursor on devices with a precise pointer (mouse or trackpad). Touch devices keep the default behavior. mix-blend-mode: difference inverts the cursor color against the background, so it stays visible on any color. And pointer-events: none prevents the cursor element from intercepting clicks on the content beneath it.
Step 3: Add the JavaScript
Add this script after the GSAP CDN tag:
document.addEventListener('DOMContentLoaded', function() {
  // Skip on touch devices
  if (window.matchMedia('(pointer: coarse)').matches) return;

  // Respect reduced motion preferences
  if (window.matchMedia('(prefers-reduced-motion: reduce)').matches) return;

  const cursor = document.querySelector('.custom-cursor');
  if (!cursor) return;

  // Smooth cursor following with gsap.quickTo
  const xTo = gsap.quickTo(cursor, 'x', { duration: 0.4, ease: 'power3.out' });
  const yTo = gsap.quickTo(cursor, 'y', { duration: 0.4, ease: 'power3.out' });

  document.addEventListener('mousemove', function(e) {
    xTo(e.clientX);
    yTo(e.clientY);
  });

  // Scale up on interactive elements
  const interactives = document.querySelectorAll('a, button, [role="button"], input[type="submit"]');

  interactives.forEach(function(el) {
    el.addEventListener('mouseenter', function() {
      gsap.to(cursor, { scale: 2.5, duration: 0.3, ease: 'power2.out' });
    });
    el.addEventListener('mouseleave', function() {
      gsap.to(cursor, { scale: 1, duration: 0.3, ease: 'power2.out' });
    });
  });

  // Shrink on click for feedback
  document.addEventListener('mousedown', function() {
    gsap.to(cursor, { scale: 0.8, duration: 0.1 });
  });
  document.addEventListener('mouseup', function() {
    gsap.to(cursor, { scale: 1, duration: 0.2 });
  });
});
Here’s what each part does:
gsap.quickTo()creates a reusable tween function. Instead of creating a new animation on every mouse event, it updates an existing one. This gives smooth, 60fps following without garbage collection overhead.duration: 0.4creates the trailing lag. Lower values (0.1-0.2) make the cursor feel snappy and tight. Higher values (0.5-0.8) make it feel floaty and loose. Start with 0.4 and adjust to taste.- Interactive element hover scales the cursor up on links, buttons, and submit inputs so users can still tell what’s clickable even without the default pointer.
- Click feedback via
mousedown/mouseupadds a tactile press-and-release feel.
The prefers-reduced-motion check at the top bails out entirely for users who’ve requested less motion. The cursor div stays hidden and the default pointer remains.
Step 4: Add it to WordPress
You’ve got three pieces of code from the steps above: the GSAP CDN tag (Step 1), the CSS and cursor HTML (Step 2), and the JavaScript (Step 3). Here’s how to add them to your WordPress site.
Option A: WPCode plugin (recommended)
WPCode (free version) is the easiest way to add custom code to WordPress without touching theme files. Install it from Plugins > Add New, search “WPCode”, and activate it.
Snippet 1: CSS (runs site-wide)
Go to Code Snippets > Add Snippet > choose “Add Your Custom Code”. Set the code type to “CSS Snippet”, paste the CSS from Step 2, and set it to run on the entire site. Toggle it on and save.
Snippet 2: Footer code (HTML + JS)
Create another snippet, this time set the code type to “HTML Snippet”. Paste everything below as-is, then set the insertion location to “Site Wide Footer”:
<div class="custom-cursor"></div>
<script src="https://cdn.jsdelivr.net/npm/gsap@3.14.2/dist/gsap.min.js"></script>
<script>
document.addEventListener('DOMContentLoaded', function() {
  if (window.matchMedia('(pointer: coarse)').matches) return;
  if (window.matchMedia('(prefers-reduced-motion: reduce)').matches) return;

  const cursor = document.querySelector('.custom-cursor');
  if (!cursor) return;

  const xTo = gsap.quickTo(cursor, 'x', { duration: 0.4, ease: 'power3.out' });
  const yTo = gsap.quickTo(cursor, 'y', { duration: 0.4, ease: 'power3.out' });

  document.addEventListener('mousemove', function(e) {
    xTo(e.clientX);
    yTo(e.clientY);
  });

  const interactives = document.querySelectorAll('a, button, [role="button"], input[type="submit"]');
  interactives.forEach(function(el) {
    el.addEventListener('mouseenter', function() {
      gsap.to(cursor, { scale: 2.5, duration: 0.3, ease: 'power2.out' });
    });
    el.addEventListener('mouseleave', function() {
      gsap.to(cursor, { scale: 1, duration: 0.3, ease: 'power2.out' });
    });
  });

  document.addEventListener('mousedown', function() {
    gsap.to(cursor, { scale: 0.8, duration: 0.1 });
  });
  document.addEventListener('mouseup', function() {
    gsap.to(cursor, { scale: 1, duration: 0.2 });
  });
});
</script>
Toggle it on and save. That’s it for WPCode.
Option B: Insert Headers and Footers plugin
If you prefer something simpler, “Insert Headers and Footers” by WPBeginner does one thing: adds code to your header and footer. Install it, then go to Settings > Insert Headers and Footers.
Paste the CSS (wrapped in <style> tags) into the “Scripts in Header” box. Paste the cursor div, GSAP CDN tag, and JavaScript into the “Scripts in Footer” box.
Option C: Child theme
If you’re comfortable editing theme files, add the CSS to your child theme’s style.css. Then add the cursor element and scripts via functions.php:
// In your child theme's functions.php
add_action('wp_footer', function() {
  echo '<div class="custom-cursor"></div>';
});

add_action('wp_enqueue_scripts', function() {
  wp_enqueue_script('gsap', 'https://cdn.jsdelivr.net/npm/gsap@3.14.2/dist/gsap.min.js', [], '3.14.2', true);
  wp_enqueue_script('custom-cursor', get_stylesheet_directory_uri() . '/js/custom-cursor.js', ['gsap'], '1.0', true);
});
Save the JavaScript from Step 3 as js/custom-cursor.js in your child theme folder. This approach survives plugin changes and gives you full control over script loading order.
Page builders
If you’re using Elementor, Bricks, Beaver Builder, or similar, add the CSS via the builder’s global custom CSS field (usually under Site Settings or Theme Options). For the JavaScript, use a footer code widget, a “Custom Code” feature if your builder has one, or fall back to WPCode.
Common issues
Caching: If you use a caching plugin (WP Super Cache, W3 Total Cache, WP Rocket), clear your cache after adding the scripts. Cached pages may serve the old version without your cursor code. Some aggressive caching setups also defer or delay JavaScript loading, which can cause a brief flash of the default cursor before the custom one initializes.
Theme cursor styles: Some WordPress themes apply their own cursor styles to specific elements. If the default cursor still appears on certain areas, inspect those elements and add cursor: none to override the theme’s styles.
Script loading order: The cursor script must load after GSAP. If you’re using WPCode or a similar plugin, make sure the GSAP CDN tag appears before the cursor script in the same snippet, or use separate snippets with the right priority. The child theme approach with wp_enqueue_script handles this automatically via the dependency parameter.
That’s it
Move your mouse and the custom cursor follows with a smooth trailing lag. Links and buttons get a hover scale. Touch devices keep the default cursor. Users who prefer reduced motion see no changes.
To customize: adjust the color by changing the background value. Adjust the trailing speed by changing the duration in quickTo. Adjust the size by changing the width/height and the hover scale multiplier.
Going further
This basic cursor follower is a solid starting point. The GSAP Vault effects library includes three cursor-related effects that build on these same techniques with additional features:
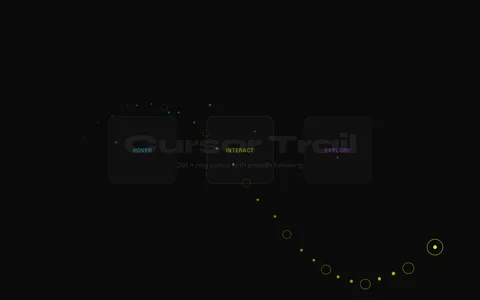
Cursor Trail is a dual-element cursor system with a dot and a trailing ring that follow the mouse at different speeds. It includes three easing presets (smooth, elastic, snappy), a spotlight reveal mode that unmasks content around the cursor, hover state detection with configurable ring expansion, and click feedback. Full CSS custom property support for theming.
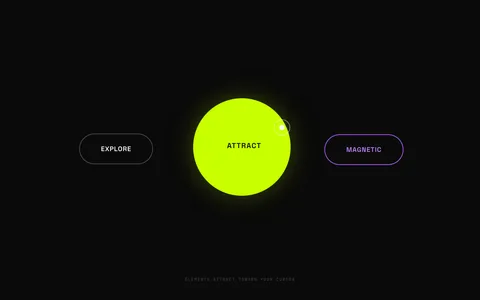
Magnetic Cursor makes elements attract toward the cursor with elastic physics when the mouse enters their proximity. Configurable magnetic radius and attraction strength per element via data attributes, separate inner content movement for layered depth effects, and automatic disable on touch devices. Works on any HTML element: buttons, links, images, cards.
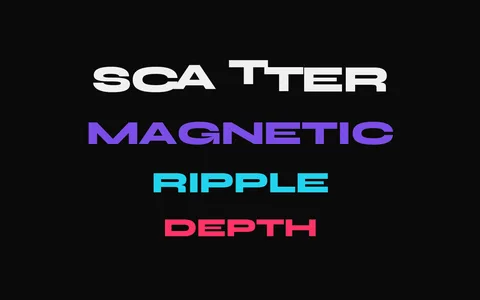
Text Hover Distortion makes individual characters react to cursor proximity with physics-based displacement. Four distortion modes (push, pull, wave, rotation), configurable influence radius and strength, and real-time per-character tracking at 60fps with gsap.quickTo. Turns headings and navigation into interactive typography.
If you’re looking for more WordPress-specific GSAP tutorials, see our guide on adding a text scramble effect to WordPress. For a broader look at when custom JavaScript animations make sense versus CSS alone, see GSAP vs CSS Animations.
Looking for production-ready cursor effects? Browse the GSAP Vault effects library for cursor trails, magnetic interactions, and more.
Related Articles
- Adding a Text Scramble Effect to WordPress - Another step-by-step WordPress tutorial using GSAP and ScrollTrigger.
- GSAP vs CSS Animations: A Practical Guide - When CSS transitions are enough and when you need JavaScript animation.
- Text Animations with GSAP: Four Approaches Compared - Split reveals, scramble decodes, glitch effects, and cursor-driven text reactions.
- Using AI to Customize GSAP Effects - Use AI assistants to customize and integrate GSAP effects faster.