You’ve mastered Webflow’s interactions panel. Scroll into view triggers, hover states, page load animations—they handle a surprising amount. But you’ve probably hit moments where you think “I’ve seen this effect on other sites, why can’t I build it here?”
That’s where custom code comes in. Not because Webflow interactions are bad—they’re excellent for most use cases—but because some effects simply require JavaScript.
This guide covers when Webflow’s native interactions are enough, when they’re not, and how to add GSAP for the effects that need it.
What Webflow interactions do well
Webflow’s built-in interactions handle many common animation needs:
Scroll-triggered entrances — Elements fade, slide, or scale into view as you scroll down. The interactions panel makes this visual and straightforward.
Hover states — Buttons grow, cards lift, images zoom. All configurable without code.
Page transitions — Fade between pages, animate elements on load. Works with Webflow’s native page routing.
Lottie animations — Drop in After Effects animations and trigger them on scroll or hover.
Reduced motion toggle — Webflow respects the system preference automatically when you use native interactions.
For marketing sites, portfolios, and landing pages, native interactions often cover everything you need.
Where they hit a ceiling
Some effects can’t be built with the interactions panel, no matter how creative you get:
Text splitting
You want text to reveal character-by-character, or words to stagger in one at a time. Webflow interactions work on elements, not individual characters. To animate “Hello World” letter by letter, you’d need 11 separate elements—impractical and unmaintainable.
Scroll-linked scrubbing
Native scroll triggers play an animation when you scroll to a point. But what if you want the animation progress tied to scroll position? Scroll down, animation moves forward. Scroll up, it reverses. This “scrubbing” effect is common on award-winning sites but isn’t possible natively.
Physics-based motion
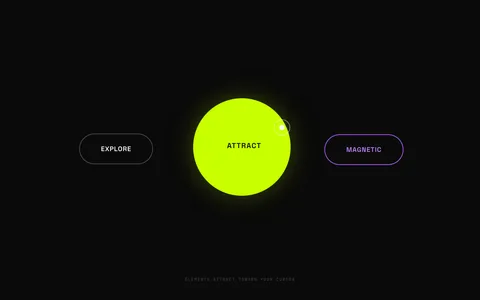
Magnetic buttons that attract to your cursor. Elastic overshoot. Momentum and deceleration. These effects require calculating distances and applying forces—math that the interactions panel doesn’t expose.
Cursor-following effects
Custom cursors, spotlight reveals, elements that react to mouse position. Webflow interactions can respond to hover (over/out), but not to continuous mouse coordinates.
Complex sequencing
You need animation A to finish, then B plays, but only if the user has scrolled past section C, and the whole thing should pause on hover. Native interactions support basic sequencing, but conditional logic and dynamic timing require code.
Enter GSAP
GSAP (GreenSock Animation Platform) is the JavaScript library behind most of those effects you’ve admired on Awwwards. It’s been around since Flash days and is now the industry standard for web animation.
Key things to know:
- It’s free for most uses (including commercial Webflow sites)
- It’s performant — handles complex animations at 60fps
- It’s well-documented — huge community, lots of examples
- It works via CDN — no build tools, just script tags
GSAP doesn’t replace Webflow interactions. Use native interactions for simple reveals and hovers. Reach for GSAP when you need something they can’t do.
How to add custom code in Webflow
Webflow offers three places to add custom code:
Site-wide (Project Settings)
Project Settings → Custom Code → Footer Code
Scripts added here load on every page. Use this for GSAP core and plugins you’ll use throughout the site.
<!-- Add to Footer Code -->
<script src="https://cdn.jsdelivr.net/npm/gsap@3.14.2/dist/gsap.min.js"></script>
<script src="https://cdn.jsdelivr.net/npm/gsap@3.14.2/dist/ScrollTrigger.min.js"></script>
Page-specific (Page Settings)
Pages panel → Gear icon → Custom Code → Before tag
Scripts added here only load on that specific page. Use this for page-specific animations.
Per-element (Embed component)
Drag an Embed component from the Add panel. This lets you add HTML and scripts inline. Useful for self-contained effects, but can get messy if overused.
Recommendation: Add GSAP to your site-wide footer, then use page-specific code blocks for the actual animations.
Example: Scroll-scrubbed text reveal
Here’s an effect you can’t build natively: text that reveals word-by-word as you scroll, with the animation progress tied directly to scroll position.
The HTML (Webflow)
Create a text block with a class like reveal-text. The text can be anything:
<p class="reveal-text">
  Design is not just what it looks like. Design is how it works.
</p>
The GSAP code
Add this to your page’s custom code (or site-wide footer if you’ll use it on multiple pages):
<script>
document.addEventListener('DOMContentLoaded', () => {
  // Respect reduced motion preferences
  if (window.matchMedia('(prefers-reduced-motion: reduce)').matches) return;

  gsap.registerPlugin(ScrollTrigger);

  // Find all elements with the class
  document.querySelectorAll('.reveal-text').forEach(element => {
    // Split text into words (basic approach)
    const text = element.textContent;
    const words = text.split(' ');
    element.innerHTML = words
      .map(word => `<span class="word">${word}</span>`)
      .join(' ');

    // Style the words
    gsap.set(element.querySelectorAll('.word'), {
      opacity: 0.2
    });

    // Animate on scroll
    gsap.to(element.querySelectorAll('.word'), {
      opacity: 1,
      stagger: 0.1,
      scrollTrigger: {
        trigger: element,
        start: 'top 80%',
        end: 'top 20%',
        scrub: true  // This ties animation to scroll position
      }
    });
  });
});
</script>
Add supporting CSS to your site’s custom code (head section):
<style>
.reveal-text .word {
  display: inline-block;
}
</style>
Now scroll down the page. The text reveals progressively as you scroll, and reverses if you scroll back up. This “scrub” behavior isn’t possible with native interactions.
Example: Magnetic button
Another common request: buttons that subtly attract toward the cursor as you hover near them.
The HTML (Webflow)
Give your button a class like magnetic:
<a href="/contact" class="magnetic">Get in touch</a>The GSAP code
<script>
document.addEventListener('DOMContentLoaded', () => {
  if (window.matchMedia('(prefers-reduced-motion: reduce)').matches) return;

  document.querySelectorAll('.magnetic').forEach(el => {
    const strength = 0.3; // How much it moves (0-1)

    // Create smooth animation functions
    const xTo = gsap.quickTo(el, 'x', { duration: 0.4, ease: 'power3.out' });
    const yTo = gsap.quickTo(el, 'y', { duration: 0.4, ease: 'power3.out' });

    el.addEventListener('mousemove', (e) => {
      const rect = el.getBoundingClientRect();
      const x = e.clientX - rect.left - rect.width / 2;
      const y = e.clientY - rect.top - rect.height / 2;

      xTo(x * strength);
      yTo(y * strength);
    });

    el.addEventListener('mouseleave', () => {
      xTo(0);
      yTo(0);
    });
  });
});
</script>
The button now follows your cursor with smooth, elastic motion. Try recreating this with native interactions; you can’t, because it requires knowing the cursor’s exact position within the element.
For a production-ready version with configurable strength, per-element settings via data attributes, and automatic touch device detection, see the Magnetic Cursor effect. It also handles edge cases like elements near viewport boundaries and includes proper cleanup for single-page applications.
Touch device note: Magnetic effects are inherently desktop-only since they rely on continuous cursor tracking. On touch devices, the effect should either disable gracefully or provide a tap-based alternative. The Magnetic Cursor effect handles this automatically by detecting touch support and skipping initialization.
When to use native vs GSAP
Use Webflow interactions when:
- Fade/slide/scale on scroll or hover
- Simple page transitions
- Lottie playback control
- You want visual editing without code
- The site will be maintained by non-developers
Use GSAP when:
- Text needs to split into characters or words
- Animation should scrub with scroll position
- You need physics (magnetic, elastic, momentum)
- Cursor position affects the animation
- Complex conditional sequencing
- Performance is critical (many simultaneous animations)
Hybrid approach: Use native interactions for most of the site. Add GSAP only for hero moments that need it. This keeps the project maintainable while unlocking effects that would otherwise be impossible.
Getting started
Here’s a minimal setup to drop into your Webflow project’s footer:
<!-- GSAP Core -->
<script src="https://cdn.jsdelivr.net/npm/gsap@3.14.2/dist/gsap.min.js"></script>

<!-- ScrollTrigger (for scroll-based animations) -->
<script src="https://cdn.jsdelivr.net/npm/gsap@3.14.2/dist/ScrollTrigger.min.js"></script>

<script>
document.addEventListener('DOMContentLoaded', () => {
  // Respect reduced motion
  if (window.matchMedia('(prefers-reduced-motion: reduce)').matches) return;

  gsap.registerPlugin(ScrollTrigger);

  // Your animations go here
});
</script>
From here, the GSAP documentation covers everything from basic tweens to advanced scroll effects.
Conclusion
Webflow interactions aren’t limited—they’re just scoped to what visual tools can reasonably express. For scroll reveals, hovers, and page transitions, they work well. For text splitting, scroll scrubbing, physics, and cursor effects, you need code.
GSAP fills that gap cleanly. A few script tags, some JavaScript, and suddenly those “how did they do that?” effects are within reach.
Start with native interactions. Reach for GSAP when you hit the ceiling.
Looking for production-ready animations you can drop into Webflow? Browse the GSAP Vault effects library for scroll reveals, text effects, and interactive components with copy-paste code.
Related Articles
- Animation for Content Editors - The vocabulary and context non-developers need to discuss animations with their team.
- GSAP vs CSS Animations: A Practical Guide - Understand when CSS animations are sufficient and when GSAP becomes essential.
- Animate on Scroll: 3 Approaches Compared - Compare CSS scroll animations, Intersection Observer, and GSAP ScrollTrigger side by side.